Random Posts Widget to Blogspot
The Random Posts widget or gadget for Blogger will show random posts you
have added to your blog that due to the natural structure of blogs,
could get lost deep in your archives, as most new users join and pick up
from the moment they join, and they never bother going back to one of
your good posts.
One of the easiest way to give a new life to your older posts is to display them in a random order in your sidebar. In this tutorial, I will share how you can add a random posts gadget in a Blogger blog.
One of the easiest way to give a new life to your older posts is to display them in a random order in your sidebar. In this tutorial, I will share how you can add a random posts gadget in a Blogger blog.
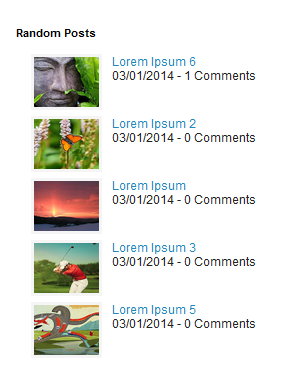
The advantages of this widget is that is loading pretty fast and shows
thumbnails of your posts and how many comments they have received, as
well. So, let's begin adding it!
Step 1. From your Blogger Dashboard, Go to Layout, click on Add a Gadget

Step 2. Add a new HTML/JavaScript Gadget

Step 3. Paste the following code in the empy HTML box:
For bigger thumbnails, change the pixels in red from width:65px;height:50px;
Step 4. Press Save and you're done! Enjoy!
How to add Random Posts Widget to Blogger
Step 1. From your Blogger Dashboard, Go to Layout, click on Add a Gadget
Step 2. Add a new HTML/JavaScript Gadget
Step 3. Paste the following code in the empy HTML box:
<style>Replace 5 with the number of posts you want to be show.
#random-posts img{float:left;margin-right:10px;
width:65px;height:50px;background-color: #F5F5F5;padding: 3px;}
ul#random-posts {list-style-type: none;}
</style>
<ul id='random-posts'>
<script type='text/javaScript'>
var rdp_numposts=5;
var rdp_snippet_length=150;
var rdp_info='yes';
var rdp_comment='Comments';
var rdp_disable='Comments Disabled';
var rdp_current=[];var rdp_total_posts=0;var rdp_current=new Array(rdp_numposts);function totalposts(json){rdp_total_posts=json.feed.openSearch$totalResults.$t}document.write('<script type=\"text/javascript\" src=\"/feeds/posts/default?alt=json-in-script&max-results=0&callback=totalposts\"><\/script>');function getvalue(){for(var i=0;i<rdp_numposts;i++){var found=false;var rndValue=get_random();for(var j=0;j<rdp_current.length;j++){if(rdp_current[j]==rndValue){found=true;break}};if(found){i--}else{rdp_current[i]=rndValue}}};function get_random(){var ranNum=1+Math.round(Math.random()*(rdp_total_posts-1));return ranNum};
</script>
<script type='text/javaScript'>
function random_posts(json){for(var i=0;i<rdp_numposts;i++){var entry=json.feed.entry[i];var rdp_posttitle=entry.title.$t;if('content'in entry){var rdp_get_snippet=entry.content.$t}else{if('summary'in entry){var rdp_get_snippet=entry.summary.$t}else{var rdp_get_snippet="";}};rdp_get_snippet=rdp_get_snippet.replace(/<[^>]*>/g,"");if(rdp_get_snippet.length<rdp_snippet_length){var rdp_snippet=rdp_get_snippet}else{rdp_get_snippet=rdp_get_snippet.substring(0,rdp_snippet_length);var space=rdp_get_snippet.lastIndexOf(" ");rdp_snippet=rdp_get_snippet.substring(0,space)+"…";};for(var j=0;j<entry.link.length;j++){if('thr$total'in entry){var rdp_commentsNum=entry.thr$total.$t+' '+rdp_comment}else{rdp_commentsNum=rdp_disable};if(entry.link[j].rel=='alternate'){var rdp_posturl=entry.link[j].href;var rdp_postdate=entry.published.$t;if('media$thumbnail'in entry){var rdp_thumb=entry.media$thumbnail.url}else{rdp_thumb="https://blogger.googleusercontent.com/img/b/R29vZ2xl/AVvXsEjBnpR5lDZhyphenhyphend91xdjFBXV_OacMyHD8fWf6XlwMtNxWmvjLr6vJ1uT4XUA6XB7k3C3FMXm92Z98v4UnnebSCaJ7uSnFLIau_oSrAfejeTTw-A1dKXt42sLv7MRG-o2-PPodGzNY_OzxMo8/s1600/no_thumb.png"}}};document.write('<li>');document.write('<img alt="'+rdp_posttitle+'" src="'+rdp_thumb+'"/>');document.write('<div><a href="'+rdp_posturl+'" rel="nofollow" title="'+rdp_snippet+'">'+rdp_posttitle+'</a></div>');if(rdp_info=='yes'){document.write('<span>'+rdp_postdate.substring(8,10)+'/'+rdp_postdate.substring(5,7)+'/'+rdp_postdate.substring(0,4)+' - '+rdp_commentsNum)+'</span>'}document.write('<div style="clear:both"></div></li>')}};getvalue();for(var i=0;i<rdp_numposts;i++){document.write('<script type=\"text/javascript\" src=\"/feeds/posts/default?alt=json-in-script&start-index='+rdp_current[i]+'&max-results=1&callback=random_posts\"><\/script>')};
</script>
</ul>
For bigger thumbnails, change the pixels in red from width:65px;height:50px;
Step 4. Press Save and you're done! Enjoy!